Difference between revisions of "Technology"
From Airships Wiki
(Generated article) |
(Generated article) |
||
| Line 5: | Line 5: | ||
{| style="background-color: #4E4E4E; border: thin solid black; margin: 0 auto; width: 100%; font-size: 11px; " | {| style="background-color: #4E4E4E; border: thin solid black; margin: 0 auto; width: 100%; font-size: 11px; " | ||
|- | |- | ||
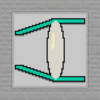
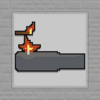
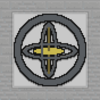
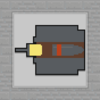
| style="background-color: #5A5959; padding: 15px; width: | | style="background-color: #5A5959; padding: 15px; width: 5%; text-align: right; " colspan="1" | [[File:GUNNERY.png|center]] | ||
| style="vertical-align: top; width: 0.1%; " | <div> | | style="vertical-align: top; width: 0.1%; " | <div> | ||
{| style="background-color: #4E4E4E; font-size: 11px; margin: 5px 0px 0px 5px; height: 100%; " | {| style="background-color: #4E4E4E; font-size: 11px; margin: 5px 0px 0px 5px; height: 100%; " | ||
| Line 42: | Line 42: | ||
{| style="background-color: #4E4E4E; border: thin solid black; margin: 0 auto; width: 100%; font-size: 11px; " | {| style="background-color: #4E4E4E; border: thin solid black; margin: 0 auto; width: 100%; font-size: 11px; " | ||
|- | |- | ||
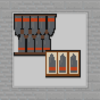
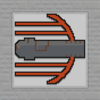
| style="background-color: #5A5959; padding: 15px; width: | | style="background-color: #5A5959; padding: 15px; width: 5%; text-align: right; " colspan="1" | [[File:MERCANTILISM.png|center]] | ||
| style="vertical-align: top; width: 0.1%; " | <div> | | style="vertical-align: top; width: 0.1%; " | <div> | ||
{| style="background-color: #4E4E4E; font-size: 11px; margin: 5px 0px 0px 5px; height: 100%; " | {| style="background-color: #4E4E4E; font-size: 11px; margin: 5px 0px 0px 5px; height: 100%; " | ||
| Line 65: | Line 65: | ||
! style="background-color: #333333; font-size: 12px; text-align: left; padding-left: 10px; " colspan="2" | Unlocks: | ! style="background-color: #333333; font-size: 12px; text-align: left; padding-left: 10px; " colspan="2" | Unlocks: | ||
|- | |- | ||
| style="background-color: #5A5959; padding: 15px; width: | | style="background-color: #5A5959; padding: 15px; width: 5%; text-align: right; " colspan="1" | Mercantilism | ||
|Market and Port | |Market and Port | ||
|- | |- | ||
| Line 78: | Line 78: | ||
{| style="background-color: #4E4E4E; border: thin solid black; margin: 0 auto; width: 100%; font-size: 11px; " | {| style="background-color: #4E4E4E; border: thin solid black; margin: 0 auto; width: 100%; font-size: 11px; " | ||
|- | |- | ||
| style="background-color: #5A5959; padding: 15px; width: | | style="background-color: #5A5959; padding: 15px; width: 5%; text-align: right; " colspan="1" | [[File:ENERGISED_SUSPENDIUM.png|center]] | ||
| style="vertical-align: top; width: 0.1%; " | <div> | | style="vertical-align: top; width: 0.1%; " | <div> | ||
{| style="background-color: #4E4E4E; font-size: 11px; margin: 5px 0px 0px 5px; height: 100%; " | {| style="background-color: #4E4E4E; font-size: 11px; margin: 5px 0px 0px 5px; height: 100%; " | ||
| Line 113: | Line 113: | ||
{| style="background-color: #4E4E4E; border: thin solid black; margin: 0 auto; width: 100%; font-size: 11px; " | {| style="background-color: #4E4E4E; border: thin solid black; margin: 0 auto; width: 100%; font-size: 11px; " | ||
|- | |- | ||
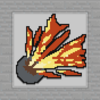
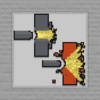
| style="background-color: #5A5959; padding: 15px; width: | | style="background-color: #5A5959; padding: 15px; width: 5%; text-align: right; " colspan="1" | [[File:EXPLOSIVES.png|center]] | ||
| style="vertical-align: top; width: 0.1%; " | <div> | | style="vertical-align: top; width: 0.1%; " | <div> | ||
{| style="background-color: #4E4E4E; font-size: 11px; margin: 5px 0px 0px 5px; height: 100%; " | {| style="background-color: #4E4E4E; font-size: 11px; margin: 5px 0px 0px 5px; height: 100%; " | ||
| Line 148: | Line 148: | ||
{| style="background-color: #4E4E4E; border: thin solid black; margin: 0 auto; width: 100%; font-size: 11px; " | {| style="background-color: #4E4E4E; border: thin solid black; margin: 0 auto; width: 100%; font-size: 11px; " | ||
|- | |- | ||
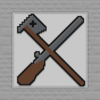
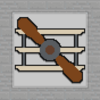
| style="background-color: #5A5959; padding: 15px; width: | | style="background-color: #5A5959; padding: 15px; width: 5%; text-align: right; " colspan="1" | [[File:MACHINERY.png|center]] | ||
| style="vertical-align: top; width: 0.1%; " | <div> | | style="vertical-align: top; width: 0.1%; " | <div> | ||
{| style="background-color: #4E4E4E; font-size: 11px; margin: 5px 0px 0px 5px; height: 100%; " | {| style="background-color: #4E4E4E; font-size: 11px; margin: 5px 0px 0px 5px; height: 100%; " | ||
| Line 187: | Line 187: | ||
{| style="background-color: #4E4E4E; border: thin solid black; margin: 0 auto; width: 100%; font-size: 11px; " | {| style="background-color: #4E4E4E; border: thin solid black; margin: 0 auto; width: 100%; font-size: 11px; " | ||
|- | |- | ||
| style="background-color: #5A5959; padding: 15px; width: | | style="background-color: #5A5959; padding: 15px; width: 5%; text-align: right; " colspan="1" | [[File:OFFICER_TRAINING.png|center]] | ||
| style="vertical-align: top; width: 0.1%; " | <div> | | style="vertical-align: top; width: 0.1%; " | <div> | ||
{| style="background-color: #4E4E4E; font-size: 11px; margin: 5px 0px 0px 5px; height: 100%; " | {| style="background-color: #4E4E4E; font-size: 11px; margin: 5px 0px 0px 5px; height: 100%; " | ||
| Line 226: | Line 226: | ||
{| style="background-color: #4E4E4E; border: thin solid black; margin: 0 auto; width: 100%; font-size: 11px; " | {| style="background-color: #4E4E4E; border: thin solid black; margin: 0 auto; width: 100%; font-size: 11px; " | ||
|- | |- | ||
| style="background-color: #5A5959; padding: 15px; width: | | style="background-color: #5A5959; padding: 15px; width: 5%; text-align: right; " colspan="1" | [[File:RIFLING.png|center]] | ||
| style="vertical-align: top; width: 0.1%; " | <div> | | style="vertical-align: top; width: 0.1%; " | <div> | ||
{| style="background-color: #4E4E4E; font-size: 11px; margin: 5px 0px 0px 5px; height: 100%; " | {| style="background-color: #4E4E4E; font-size: 11px; margin: 5px 0px 0px 5px; height: 100%; " | ||
| Line 261: | Line 261: | ||
{| style="background-color: #4E4E4E; border: thin solid black; margin: 0 auto; width: 100%; font-size: 11px; " | {| style="background-color: #4E4E4E; border: thin solid black; margin: 0 auto; width: 100%; font-size: 11px; " | ||
|- | |- | ||
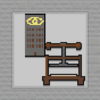
| style="background-color: #5A5959; padding: 15px; width: | | style="background-color: #5A5959; padding: 15px; width: 5%; text-align: right; " colspan="1" | [[File:EMPIRICISM.png|center]] | ||
| style="vertical-align: top; width: 0.1%; " | <div> | | style="vertical-align: top; width: 0.1%; " | <div> | ||
{| style="background-color: #4E4E4E; font-size: 11px; margin: 5px 0px 0px 5px; height: 100%; " | {| style="background-color: #4E4E4E; font-size: 11px; margin: 5px 0px 0px 5px; height: 100%; " | ||
| Line 296: | Line 296: | ||
{| style="background-color: #4E4E4E; border: thin solid black; margin: 0 auto; width: 100%; font-size: 11px; " | {| style="background-color: #4E4E4E; border: thin solid black; margin: 0 auto; width: 100%; font-size: 11px; " | ||
|- | |- | ||
| style="background-color: #5A5959; padding: 15px; width: | | style="background-color: #5A5959; padding: 15px; width: 5%; text-align: right; " colspan="1" | [[File:MILITARY_TRAINING.png|center]] | ||
| style="vertical-align: top; width: 0.1%; " | <div> | | style="vertical-align: top; width: 0.1%; " | <div> | ||
{| style="background-color: #4E4E4E; font-size: 11px; margin: 5px 0px 0px 5px; height: 100%; " | {| style="background-color: #4E4E4E; font-size: 11px; margin: 5px 0px 0px 5px; height: 100%; " | ||
| Line 338: | Line 338: | ||
{| style="background-color: #4E4E4E; border: thin solid black; margin: 0 auto; width: 100%; font-size: 11px; " | {| style="background-color: #4E4E4E; border: thin solid black; margin: 0 auto; width: 100%; font-size: 11px; " | ||
|- | |- | ||
| style="background-color: #5A5959; padding: 15px; width: | | style="background-color: #5A5959; padding: 15px; width: 5%; text-align: right; " colspan="1" | [[File:ADVANCED_EXPLOSIVES.png|center]] | ||
| style="vertical-align: top; width: 0.1%; " | <div> | | style="vertical-align: top; width: 0.1%; " | <div> | ||
{| style="background-color: #4E4E4E; font-size: 11px; margin: 5px 0px 0px 5px; height: 100%; " | {| style="background-color: #4E4E4E; font-size: 11px; margin: 5px 0px 0px 5px; height: 100%; " | ||
| Line 379: | Line 379: | ||
{| style="background-color: #4E4E4E; border: thin solid black; margin: 0 auto; width: 100%; font-size: 11px; " | {| style="background-color: #4E4E4E; border: thin solid black; margin: 0 auto; width: 100%; font-size: 11px; " | ||
|- | |- | ||
| style="background-color: #5A5959; padding: 15px; width: | | style="background-color: #5A5959; padding: 15px; width: 5%; text-align: right; " colspan="1" | [[File:AMMO_STORAGE.png|center]] | ||
| style="vertical-align: top; width: 0.1%; " | <div> | | style="vertical-align: top; width: 0.1%; " | <div> | ||
{| style="background-color: #4E4E4E; font-size: 11px; margin: 5px 0px 0px 5px; height: 100%; " | {| style="background-color: #4E4E4E; font-size: 11px; margin: 5px 0px 0px 5px; height: 100%; " | ||
| Line 402: | Line 402: | ||
! style="background-color: #325096; font-size: 12px; text-align: left; padding-left: 10px; " colspan="2" | Choose: | ! style="background-color: #325096; font-size: 12px; text-align: left; padding-left: 10px; " colspan="2" | Choose: | ||
|- | |- | ||
| style="background-color: #5A5959; padding: 15px; width: | | style="background-color: #5A5959; padding: 15px; width: 5%; text-align: right; " colspan="1" | Efficient Ammo Storage | ||
| | | | ||
<div> | <div> | ||
{| style="background-color: #4E4E4E; width: 100%; font-size: 11px; margin: 5px 5px 0px 0px; " | {| style="background-color: #4E4E4E; width: 100%; font-size: 11px; margin: 5px 5px 0px 0px; " | ||
|- | |- | ||
| style="background-color: #5A5959; padding: 15px; width: | | style="background-color: #5A5959; padding: 15px; width: 5%; text-align: right; " colspan="1" | Efficient Ammo Storage | ||
|+25% Extra Ammo Storage | |+25% Extra Ammo Storage | ||
|- | |- | ||
| Line 415: | Line 415: | ||
|- | |- | ||
| style="background-color: #5A5959; padding: 15px; width: | | style="background-color: #5A5959; padding: 15px; width: 5%; text-align: right; " colspan="1" | Safer Ammo Storage | ||
| | | | ||
<div> | <div> | ||
{| style="background-color: #4E4E4E; width: 100%; font-size: 11px; margin: 5px 5px 0px 0px; " | {| style="background-color: #4E4E4E; width: 100%; font-size: 11px; margin: 5px 5px 0px 0px; " | ||
|- | |- | ||
| style="background-color: #5A5959; padding: 15px; width: | | style="background-color: #5A5959; padding: 15px; width: 5%; text-align: right; " colspan="1" | Safer Ammo Storage | ||
|-75% Ammo Storage Flammability | |-75% Ammo Storage Flammability | ||
|- | |- | ||
| Line 436: | Line 436: | ||
{| style="background-color: #4E4E4E; border: thin solid black; margin: 0 auto; width: 100%; font-size: 11px; " | {| style="background-color: #4E4E4E; border: thin solid black; margin: 0 auto; width: 100%; font-size: 11px; " | ||
|- | |- | ||
| style="background-color: #5A5959; padding: 15px; width: | | style="background-color: #5A5959; padding: 15px; width: 5%; text-align: right; " colspan="1" | [[File:HEAVY_WOODEN_ARMOUR.png|center]] | ||
| style="vertical-align: top; width: 0.1%; " | <div> | | style="vertical-align: top; width: 0.1%; " | <div> | ||
{| style="background-color: #4E4E4E; font-size: 11px; margin: 5px 0px 0px 5px; height: 100%; " | {| style="background-color: #4E4E4E; font-size: 11px; margin: 5px 0px 0px 5px; height: 100%; " | ||
| Line 485: | Line 485: | ||
{| style="background-color: #4E4E4E; border: thin solid black; margin: 0 auto; width: 100%; font-size: 11px; " | {| style="background-color: #4E4E4E; border: thin solid black; margin: 0 auto; width: 100%; font-size: 11px; " | ||
|- | |- | ||
| style="background-color: #5A5959; padding: 15px; width: | | style="background-color: #5A5959; padding: 15px; width: 5%; text-align: right; " colspan="1" | [[File:HIGH_PRESSURE_SUSPENDIUM.png|center]] | ||
| style="vertical-align: top; width: 0.1%; " | <div> | | style="vertical-align: top; width: 0.1%; " | <div> | ||
{| style="background-color: #4E4E4E; font-size: 11px; margin: 5px 0px 0px 5px; height: 100%; " | {| style="background-color: #4E4E4E; font-size: 11px; margin: 5px 0px 0px 5px; height: 100%; " | ||
| Line 522: | Line 522: | ||
| colspan="2" | Lorem ipsum | | colspan="2" | Lorem ipsum | ||
|- | |- | ||
| style="background-color: #5A5959; padding: 15px; width: | | style="background-color: #5A5959; padding: 15px; width: 5%; text-align: right; " colspan="1" | High-Pressure Suspendium | ||
|Pressurised Suspendium Dust Tank | |Pressurised Suspendium Dust Tank | ||
|- | |- | ||
| Line 535: | Line 535: | ||
{| style="background-color: #4E4E4E; border: thin solid black; margin: 0 auto; width: 100%; font-size: 11px; " | {| style="background-color: #4E4E4E; border: thin solid black; margin: 0 auto; width: 100%; font-size: 11px; " | ||
|- | |- | ||
| style="background-color: #5A5959; padding: 15px; width: | | style="background-color: #5A5959; padding: 15px; width: 5%; text-align: right; " colspan="1" | [[File:ARTICULATED_MACHINERY.png|center]] | ||
| style="vertical-align: top; width: 0.1%; " | <div> | | style="vertical-align: top; width: 0.1%; " | <div> | ||
{| style="background-color: #4E4E4E; font-size: 11px; margin: 5px 0px 0px 5px; height: 100%; " | {| style="background-color: #4E4E4E; font-size: 11px; margin: 5px 0px 0px 5px; height: 100%; " | ||
| Line 582: | Line 582: | ||
{| style="background-color: #4E4E4E; border: thin solid black; margin: 0 auto; width: 100%; font-size: 11px; " | {| style="background-color: #4E4E4E; border: thin solid black; margin: 0 auto; width: 100%; font-size: 11px; " | ||
|- | |- | ||
| style="background-color: #5A5959; padding: 15px; width: | | style="background-color: #5A5959; padding: 15px; width: 5%; text-align: right; " colspan="1" | [[File:OPTICS.png|center]] | ||
| style="vertical-align: top; width: 0.1%; " | <div> | | style="vertical-align: top; width: 0.1%; " | <div> | ||
{| style="background-color: #4E4E4E; font-size: 11px; margin: 5px 0px 0px 5px; height: 100%; " | {| style="background-color: #4E4E4E; font-size: 11px; margin: 5px 0px 0px 5px; height: 100%; " | ||
| Line 627: | Line 627: | ||
{| style="background-color: #4E4E4E; border: thin solid black; margin: 0 auto; width: 100%; font-size: 11px; " | {| style="background-color: #4E4E4E; border: thin solid black; margin: 0 auto; width: 100%; font-size: 11px; " | ||
|- | |- | ||
| style="background-color: #5A5959; padding: 15px; width: | | style="background-color: #5A5959; padding: 15px; width: 5%; text-align: right; " colspan="1" | [[File:AERIAL_CORPS.png|center]] | ||
| style="vertical-align: top; width: 0.1%; " | <div> | | style="vertical-align: top; width: 0.1%; " | <div> | ||
{| style="background-color: #4E4E4E; font-size: 11px; margin: 5px 0px 0px 5px; height: 100%; " | {| style="background-color: #4E4E4E; font-size: 11px; margin: 5px 0px 0px 5px; height: 100%; " | ||
| Line 664: | Line 664: | ||
| colspan="2" | Lorem ipsum | | colspan="2" | Lorem ipsum | ||
|- | |- | ||
| style="background-color: #5A5959; padding: 15px; width: | | style="background-color: #5A5959; padding: 15px; width: 5%; text-align: right; " colspan="1" | Harpooners | ||
|Harpoon Guns | |Harpoon Guns | ||
|- | |- | ||
| Line 677: | Line 677: | ||
{| style="background-color: #4E4E4E; border: thin solid black; margin: 0 auto; width: 100%; font-size: 11px; " | {| style="background-color: #4E4E4E; border: thin solid black; margin: 0 auto; width: 100%; font-size: 11px; " | ||
|- | |- | ||
| style="background-color: #5A5959; padding: 15px; width: | | style="background-color: #5A5959; padding: 15px; width: 5%; text-align: right; " colspan="1" | [[File:METALLURGY.png|center]] | ||
| style="vertical-align: top; width: 0.1%; " | <div> | | style="vertical-align: top; width: 0.1%; " | <div> | ||
{| style="background-color: #4E4E4E; font-size: 11px; margin: 5px 0px 0px 5px; height: 100%; " | {| style="background-color: #4E4E4E; font-size: 11px; margin: 5px 0px 0px 5px; height: 100%; " | ||
| Line 714: | Line 714: | ||
| colspan="2" | Lorem ipsum | | colspan="2" | Lorem ipsum | ||
|- | |- | ||
| style="background-color: #5A5959; padding: 15px; width: | | style="background-color: #5A5959; padding: 15px; width: 5%; text-align: right; " colspan="1" | Increased saw damage | ||
|+20% saw damage | |+20% saw damage | ||
|- | |- | ||
| Line 727: | Line 727: | ||
{| style="background-color: #4E4E4E; border: thin solid black; margin: 0 auto; width: 100%; font-size: 11px; " | {| style="background-color: #4E4E4E; border: thin solid black; margin: 0 auto; width: 100%; font-size: 11px; " | ||
|- | |- | ||
| style="background-color: #5A5959; padding: 15px; width: | | style="background-color: #5A5959; padding: 15px; width: 5%; text-align: right; " colspan="1" | [[File:SECURITY.png|center]] | ||
| style="vertical-align: top; width: 0.1%; " | <div> | | style="vertical-align: top; width: 0.1%; " | <div> | ||
{| style="background-color: #4E4E4E; font-size: 11px; margin: 5px 0px 0px 5px; height: 100%; " | {| style="background-color: #4E4E4E; font-size: 11px; margin: 5px 0px 0px 5px; height: 100%; " | ||
| Line 774: | Line 774: | ||
{| style="background-color: #4E4E4E; border: thin solid black; margin: 0 auto; width: 100%; font-size: 11px; " | {| style="background-color: #4E4E4E; border: thin solid black; margin: 0 auto; width: 100%; font-size: 11px; " | ||
|- | |- | ||
| style="background-color: #5A5959; padding: 15px; width: | | style="background-color: #5A5959; padding: 15px; width: 5%; text-align: right; " colspan="1" | [[File:ECONOMICS.png|center]] | ||
| style="vertical-align: top; width: 0.1%; " | <div> | | style="vertical-align: top; width: 0.1%; " | <div> | ||
{| style="background-color: #4E4E4E; font-size: 11px; margin: 5px 0px 0px 5px; height: 100%; " | {| style="background-color: #4E4E4E; font-size: 11px; margin: 5px 0px 0px 5px; height: 100%; " | ||
| Line 805: | Line 805: | ||
! style="background-color: #325096; font-size: 12px; text-align: left; padding-left: 10px; " colspan="2" | Choose: | ! style="background-color: #325096; font-size: 12px; text-align: left; padding-left: 10px; " colspan="2" | Choose: | ||
|- | |- | ||
| style="background-color: #5A5959; padding: 15px; width: | | style="background-color: #5A5959; padding: 15px; width: 5%; text-align: right; " colspan="1" | Autarky | ||
| | | | ||
<div> | <div> | ||
{| style="background-color: #4E4E4E; width: 100%; font-size: 11px; margin: 5px 5px 0px 0px; " | {| style="background-color: #4E4E4E; width: 100%; font-size: 11px; margin: 5px 5px 0px 0px; " | ||
|- | |- | ||
| style="background-color: #5A5959; padding: 15px; width: | | style="background-color: #5A5959; padding: 15px; width: 5%; text-align: right; " colspan="1" | Autarky | ||
|+5% town and city income | |+5% town and city income | ||
|- | |- | ||
| Line 818: | Line 818: | ||
|- | |- | ||
| style="background-color: #5A5959; padding: 15px; width: | | style="background-color: #5A5959; padding: 15px; width: 5%; text-align: right; " colspan="1" | Free Trade | ||
| | | | ||
<div> | <div> | ||
{| style="background-color: #4E4E4E; width: 100%; font-size: 11px; margin: 5px 5px 0px 0px; " | {| style="background-color: #4E4E4E; width: 100%; font-size: 11px; margin: 5px 5px 0px 0px; " | ||
|- | |- | ||
| style="background-color: #5A5959; padding: 15px; width: | | style="background-color: #5A5959; padding: 15px; width: 5%; text-align: right; " colspan="1" | Free Trade | ||
|+40% income from trade treaties | |+40% income from trade treaties | ||
|- | |- | ||
| Line 840: | Line 840: | ||
{| style="background-color: #4E4E4E; border: thin solid black; margin: 0 auto; width: 100%; font-size: 11px; " | {| style="background-color: #4E4E4E; border: thin solid black; margin: 0 auto; width: 100%; font-size: 11px; " | ||
|- | |- | ||
| style="background-color: #5A5959; padding: 15px; width: | | style="background-color: #5A5959; padding: 15px; width: 5%; text-align: right; " colspan="1" | [[File:HEAVIER_THAN_AIR_FLIGHT.png|center]] | ||
| style="vertical-align: top; width: 0.1%; " | <div> | | style="vertical-align: top; width: 0.1%; " | <div> | ||
{| style="background-color: #4E4E4E; font-size: 11px; margin: 5px 0px 0px 5px; height: 100%; " | {| style="background-color: #4E4E4E; font-size: 11px; margin: 5px 0px 0px 5px; height: 100%; " | ||
| Line 883: | Line 883: | ||
{| style="background-color: #4E4E4E; border: thin solid black; margin: 0 auto; width: 100%; font-size: 11px; " | {| style="background-color: #4E4E4E; border: thin solid black; margin: 0 auto; width: 100%; font-size: 11px; " | ||
|- | |- | ||
| style="background-color: #5A5959; padding: 15px; width: | | style="background-color: #5A5959; padding: 15px; width: 5%; text-align: right; " colspan="1" | [[File:HEAVY_CANNON.png|center]] | ||
| style="vertical-align: top; width: 0.1%; " | <div> | | style="vertical-align: top; width: 0.1%; " | <div> | ||
{| style="background-color: #4E4E4E; font-size: 11px; margin: 5px 0px 0px 5px; height: 100%; " | {| style="background-color: #4E4E4E; font-size: 11px; margin: 5px 0px 0px 5px; height: 100%; " | ||
| Line 928: | Line 928: | ||
{| style="background-color: #4E4E4E; border: thin solid black; margin: 0 auto; width: 100%; font-size: 11px; " | {| style="background-color: #4E4E4E; border: thin solid black; margin: 0 auto; width: 100%; font-size: 11px; " | ||
|- | |- | ||
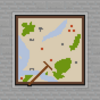
| style="background-color: #5A5959; padding: 15px; width: | | style="background-color: #5A5959; padding: 15px; width: 5%; text-align: right; " colspan="1" | [[File:SCIENTIFIC_SUSPENDIUM_MINING.png|center]] | ||
| style="vertical-align: top; width: 0.1%; " | <div> | | style="vertical-align: top; width: 0.1%; " | <div> | ||
{| style="background-color: #4E4E4E; font-size: 11px; margin: 5px 0px 0px 5px; height: 100%; " | {| style="background-color: #4E4E4E; font-size: 11px; margin: 5px 0px 0px 5px; height: 100%; " | ||
| Line 975: | Line 975: | ||
{| style="background-color: #4E4E4E; border: thin solid black; margin: 0 auto; width: 100%; font-size: 11px; " | {| style="background-color: #4E4E4E; border: thin solid black; margin: 0 auto; width: 100%; font-size: 11px; " | ||
|- | |- | ||
| style="background-color: #5A5959; padding: 15px; width: | | style="background-color: #5A5959; padding: 15px; width: 5%; text-align: right; " colspan="1" | [[File:MACHINING.png|center]] | ||
| style="vertical-align: top; width: 0.1%; " | <div> | | style="vertical-align: top; width: 0.1%; " | <div> | ||
{| style="background-color: #4E4E4E; font-size: 11px; margin: 5px 0px 0px 5px; height: 100%; " | {| style="background-color: #4E4E4E; font-size: 11px; margin: 5px 0px 0px 5px; height: 100%; " | ||
| Line 1,030: | Line 1,030: | ||
{| style="background-color: #4E4E4E; border: thin solid black; margin: 0 auto; width: 100%; font-size: 11px; " | {| style="background-color: #4E4E4E; border: thin solid black; margin: 0 auto; width: 100%; font-size: 11px; " | ||
|- | |- | ||
| style="background-color: #5A5959; padding: 15px; width: | | style="background-color: #5A5959; padding: 15px; width: 5%; text-align: right; " colspan="1" | [[File:FORTIFICATIONS.png|center]] | ||
| style="vertical-align: top; width: 0.1%; " | <div> | | style="vertical-align: top; width: 0.1%; " | <div> | ||
{| style="background-color: #4E4E4E; font-size: 11px; margin: 5px 0px 0px 5px; height: 100%; " | {| style="background-color: #4E4E4E; font-size: 11px; margin: 5px 0px 0px 5px; height: 100%; " | ||
| Line 1,057: | Line 1,057: | ||
| colspan="2" | Lorem ipsum | | colspan="2" | Lorem ipsum | ||
|- | |- | ||
| style="background-color: #5A5959; padding: 15px; width: | | style="background-color: #5A5959; padding: 15px; width: 5%; text-align: right; " colspan="1" | Faster building construction | ||
|+50% building construction speed | |+50% building construction speed | ||
|- | |- | ||
| colspan="2" | Lorem ipsum | | colspan="2" | Lorem ipsum | ||
|- | |- | ||
| style="background-color: #5A5959; padding: 15px; width: | | style="background-color: #5A5959; padding: 15px; width: 5%; text-align: right; " colspan="1" | Faster city upgrades | ||
|+50% city upgrade speed | |+50% city upgrade speed | ||
|- | |- | ||
| Line 1,075: | Line 1,075: | ||
{| style="background-color: #4E4E4E; border: thin solid black; margin: 0 auto; width: 100%; font-size: 11px; " | {| style="background-color: #4E4E4E; border: thin solid black; margin: 0 auto; width: 100%; font-size: 11px; " | ||
|- | |- | ||
| style="background-color: #5A5959; padding: 15px; width: | | style="background-color: #5A5959; padding: 15px; width: 5%; text-align: right; " colspan="1" | [[File:COMBUSTIBLES.png|center]] | ||
| style="vertical-align: top; width: 0.1%; " | <div> | | style="vertical-align: top; width: 0.1%; " | <div> | ||
{| style="background-color: #4E4E4E; font-size: 11px; margin: 5px 0px 0px 5px; height: 100%; " | {| style="background-color: #4E4E4E; font-size: 11px; margin: 5px 0px 0px 5px; height: 100%; " | ||
| Line 1,118: | Line 1,118: | ||
{| style="background-color: #4E4E4E; border: thin solid black; margin: 0 auto; width: 100%; font-size: 11px; " | {| style="background-color: #4E4E4E; border: thin solid black; margin: 0 auto; width: 100%; font-size: 11px; " | ||
|- | |- | ||
| style="background-color: #5A5959; padding: 15px; width: | | style="background-color: #5A5959; padding: 15px; width: 5%; text-align: right; " colspan="1" | [[File:CIVIL_SOCIETY.png|center]] | ||
| style="vertical-align: top; width: 0.1%; " | <div> | | style="vertical-align: top; width: 0.1%; " | <div> | ||
{| style="background-color: #4E4E4E; font-size: 11px; margin: 5px 0px 0px 5px; height: 100%; " | {| style="background-color: #4E4E4E; font-size: 11px; margin: 5px 0px 0px 5px; height: 100%; " | ||
| Line 1,147: | Line 1,147: | ||
! style="background-color: #325096; font-size: 12px; text-align: left; padding-left: 10px; " colspan="2" | Choose: | ! style="background-color: #325096; font-size: 12px; text-align: left; padding-left: 10px; " colspan="2" | Choose: | ||
|- | |- | ||
| style="background-color: #5A5959; padding: 15px; width: | | style="background-color: #5A5959; padding: 15px; width: 5%; text-align: right; " colspan="1" | Surveillance State | ||
| | | | ||
<div> | <div> | ||
{| style="background-color: #4E4E4E; width: 100%; font-size: 11px; margin: 5px 5px 0px 0px; " | {| style="background-color: #4E4E4E; width: 100%; font-size: 11px; margin: 5px 5px 0px 0px; " | ||
|- | |- | ||
| style="background-color: #5A5959; padding: 15px; width: | | style="background-color: #5A5959; padding: 15px; width: 5%; text-align: right; " colspan="1" | Surveillance State | ||
|+25 spy defence | |+25 spy defence | ||
|- | |- | ||
| Line 1,160: | Line 1,160: | ||
|- | |- | ||
| style="background-color: #5A5959; padding: 15px; width: | | style="background-color: #5A5959; padding: 15px; width: 5%; text-align: right; " colspan="1" | Free Press | ||
| | | | ||
<div> | <div> | ||
{| style="background-color: #4E4E4E; width: 100%; font-size: 11px; margin: 5px 5px 0px 0px; " | {| style="background-color: #4E4E4E; width: 100%; font-size: 11px; margin: 5px 5px 0px 0px; " | ||
|- | |- | ||
| style="background-color: #5A5959; padding: 15px; width: | | style="background-color: #5A5959; padding: 15px; width: 5%; text-align: right; " colspan="1" | Free Press | ||
|+10% research | |+10% research | ||
|- | |- | ||
| Line 1,181: | Line 1,181: | ||
{| style="background-color: #4E4E4E; border: thin solid black; margin: 0 auto; width: 100%; font-size: 11px; " | {| style="background-color: #4E4E4E; border: thin solid black; margin: 0 auto; width: 100%; font-size: 11px; " | ||
|- | |- | ||
| style="background-color: #5A5959; padding: 15px; width: | | style="background-color: #5A5959; padding: 15px; width: 5%; text-align: right; " colspan="1" | [[File:GYROSCOPES.png|center]] | ||
| style="vertical-align: top; width: 0.1%; " | <div> | | style="vertical-align: top; width: 0.1%; " | <div> | ||
{| style="background-color: #4E4E4E; font-size: 11px; margin: 5px 0px 0px 5px; height: 100%; " | {| style="background-color: #4E4E4E; font-size: 11px; margin: 5px 0px 0px 5px; height: 100%; " | ||
| Line 1,226: | Line 1,226: | ||
{| style="background-color: #4E4E4E; border: thin solid black; margin: 0 auto; width: 100%; font-size: 11px; " | {| style="background-color: #4E4E4E; border: thin solid black; margin: 0 auto; width: 100%; font-size: 11px; " | ||
|- | |- | ||
| style="background-color: #5A5959; padding: 15px; width: | | style="background-color: #5A5959; padding: 15px; width: 5%; text-align: right; " colspan="1" | [[File:AERIAL_STRATEGY.png|center]] | ||
| style="vertical-align: top; width: 0.1%; " | <div> | | style="vertical-align: top; width: 0.1%; " | <div> | ||
{| style="background-color: #4E4E4E; font-size: 11px; margin: 5px 0px 0px 5px; height: 100%; " | {| style="background-color: #4E4E4E; font-size: 11px; margin: 5px 0px 0px 5px; height: 100%; " | ||
| Line 1,277: | Line 1,277: | ||
{| style="background-color: #4E4E4E; border: thin solid black; margin: 0 auto; width: 100%; font-size: 11px; " | {| style="background-color: #4E4E4E; border: thin solid black; margin: 0 auto; width: 100%; font-size: 11px; " | ||
|- | |- | ||
| style="background-color: #5A5959; padding: 15px; width: | | style="background-color: #5A5959; padding: 15px; width: 5%; text-align: right; " colspan="1" | [[File:ELITE_INFANTRY.png|center]] | ||
| style="vertical-align: top; width: 0.1%; " | <div> | | style="vertical-align: top; width: 0.1%; " | <div> | ||
{| style="background-color: #4E4E4E; font-size: 11px; margin: 5px 0px 0px 5px; height: 100%; " | {| style="background-color: #4E4E4E; font-size: 11px; margin: 5px 0px 0px 5px; height: 100%; " | ||
| Line 1,306: | Line 1,306: | ||
! style="background-color: #333333; font-size: 12px; text-align: left; padding-left: 10px; " colspan="2" | Unlocks: | ! style="background-color: #333333; font-size: 12px; text-align: left; padding-left: 10px; " colspan="2" | Unlocks: | ||
|- | |- | ||
| style="background-color: #5A5959; padding: 15px; width: | | style="background-color: #5A5959; padding: 15px; width: 5%; text-align: right; " colspan="1" | Grappling Hooks | ||
|Air Grenadiers | |Air Grenadiers | ||
|- | |- | ||
| colspan="2" | Lorem ipsum | | colspan="2" | Lorem ipsum | ||
|- | |- | ||
| style="background-color: #5A5959; padding: 15px; width: | | style="background-color: #5A5959; padding: 15px; width: 5%; text-align: right; " colspan="1" | Trained musketeers | ||
|+25% Musket aim and fire rate | |+25% Musket aim and fire rate | ||
|- | |- | ||
| colspan="2" | Lorem ipsum | | colspan="2" | Lorem ipsum | ||
|- | |- | ||
| style="background-color: #5A5959; padding: 15px; width: | | style="background-color: #5A5959; padding: 15px; width: 5%; text-align: right; " colspan="1" | Grenadier conditioning | ||
|+50% Grenade aim and range | |+50% Grenade aim and range | ||
|- | |- | ||
| Line 1,329: | Line 1,329: | ||
{| style="background-color: #4E4E4E; border: thin solid black; margin: 0 auto; width: 100%; font-size: 11px; " | {| style="background-color: #4E4E4E; border: thin solid black; margin: 0 auto; width: 100%; font-size: 11px; " | ||
|- | |- | ||
| style="background-color: #5A5959; padding: 15px; width: | | style="background-color: #5A5959; padding: 15px; width: 5%; text-align: right; " colspan="1" | [[File:BIOMIMETICS.png|center]] | ||
| style="vertical-align: top; width: 0.1%; " | <div> | | style="vertical-align: top; width: 0.1%; " | <div> | ||
{| style="background-color: #4E4E4E; font-size: 11px; margin: 5px 0px 0px 5px; height: 100%; " | {| style="background-color: #4E4E4E; font-size: 11px; margin: 5px 0px 0px 5px; height: 100%; " | ||
| Line 1,374: | Line 1,374: | ||
{| style="background-color: #4E4E4E; border: thin solid black; margin: 0 auto; width: 100%; font-size: 11px; " | {| style="background-color: #4E4E4E; border: thin solid black; margin: 0 auto; width: 100%; font-size: 11px; " | ||
|- | |- | ||
| style="background-color: #5A5959; padding: 15px; width: | | style="background-color: #5A5959; padding: 15px; width: 5%; text-align: right; " colspan="1" | [[File:CARTOGRAPHY.png|center]] | ||
| style="vertical-align: top; width: 0.1%; " | <div> | | style="vertical-align: top; width: 0.1%; " | <div> | ||
{| style="background-color: #4E4E4E; font-size: 11px; margin: 5px 0px 0px 5px; height: 100%; " | {| style="background-color: #4E4E4E; font-size: 11px; margin: 5px 0px 0px 5px; height: 100%; " | ||
| Line 1,397: | Line 1,397: | ||
! style="background-color: #333333; font-size: 12px; text-align: left; padding-left: 10px; " colspan="2" | Unlocks: | ! style="background-color: #333333; font-size: 12px; text-align: left; padding-left: 10px; " colspan="2" | Unlocks: | ||
|- | |- | ||
| style="background-color: #5A5959; padding: 15px; width: | | style="background-color: #5A5959; padding: 15px; width: 5%; text-align: right; " colspan="1" | Cartography | ||
|+40% fleet speed | |+40% fleet speed | ||
|- | |- | ||
| Line 1,411: | Line 1,411: | ||
{| style="background-color: #4E4E4E; border: thin solid black; margin: 0 auto; width: 100%; font-size: 11px; " | {| style="background-color: #4E4E4E; border: thin solid black; margin: 0 auto; width: 100%; font-size: 11px; " | ||
|- | |- | ||
| style="background-color: #5A5959; padding: 15px; width: | | style="background-color: #5A5959; padding: 15px; width: 5%; text-align: right; " colspan="1" | [[File:LOADING_DRILLS.png|center]] | ||
| style="vertical-align: top; width: 0.1%; " | <div> | | style="vertical-align: top; width: 0.1%; " | <div> | ||
{| style="background-color: #4E4E4E; font-size: 11px; margin: 5px 0px 0px 5px; height: 100%; " | {| style="background-color: #4E4E4E; font-size: 11px; margin: 5px 0px 0px 5px; height: 100%; " | ||
| Line 1,440: | Line 1,440: | ||
! style="background-color: #325096; font-size: 12px; text-align: left; padding-left: 10px; " colspan="2" | Choose: | ! style="background-color: #325096; font-size: 12px; text-align: left; padding-left: 10px; " colspan="2" | Choose: | ||
|- | |- | ||
| style="background-color: #5A5959; padding: 15px; width: | | style="background-color: #5A5959; padding: 15px; width: 5%; text-align: right; " colspan="1" | Faster Cannon Reload | ||
| | | | ||
<div> | <div> | ||
{| style="background-color: #4E4E4E; width: 100%; font-size: 11px; margin: 5px 5px 0px 0px; " | {| style="background-color: #4E4E4E; width: 100%; font-size: 11px; margin: 5px 5px 0px 0px; " | ||
|- | |- | ||
| style="background-color: #5A5959; padding: 15px; width: | | style="background-color: #5A5959; padding: 15px; width: 5%; text-align: right; " colspan="1" | Faster Cannon Reload | ||
|-20% Cannon Reload Time | |-20% Cannon Reload Time | ||
|- | |- | ||
| Line 1,453: | Line 1,453: | ||
|- | |- | ||
| style="background-color: #5A5959; padding: 15px; width: | | style="background-color: #5A5959; padding: 15px; width: 5%; text-align: right; " colspan="1" | Safer Cannon | ||
| | | | ||
<div> | <div> | ||
{| style="background-color: #4E4E4E; width: 100%; font-size: 11px; margin: 5px 5px 0px 0px; " | {| style="background-color: #4E4E4E; width: 100%; font-size: 11px; margin: 5px 5px 0px 0px; " | ||
|- | |- | ||
| style="background-color: #5A5959; padding: 15px; width: | | style="background-color: #5A5959; padding: 15px; width: 5%; text-align: right; " colspan="1" | Safer Cannon | ||
|Cannons no longer explode | |Cannons no longer explode | ||
|- | |- | ||
| Line 1,474: | Line 1,474: | ||
{| style="background-color: #4E4E4E; border: thin solid black; margin: 0 auto; width: 100%; font-size: 11px; " | {| style="background-color: #4E4E4E; border: thin solid black; margin: 0 auto; width: 100%; font-size: 11px; " | ||
|- | |- | ||
| style="background-color: #5A5959; padding: 15px; width: | | style="background-color: #5A5959; padding: 15px; width: 5%; text-align: right; " colspan="1" | [[File:SMALL_ARMS_BALLISTICS.png|center]] | ||
| style="vertical-align: top; width: 0.1%; " | <div> | | style="vertical-align: top; width: 0.1%; " | <div> | ||
{| style="background-color: #4E4E4E; font-size: 11px; margin: 5px 0px 0px 5px; height: 100%; " | {| style="background-color: #4E4E4E; font-size: 11px; margin: 5px 0px 0px 5px; height: 100%; " | ||
| Line 1,497: | Line 1,497: | ||
! style="background-color: #325096; font-size: 12px; text-align: left; padding-left: 10px; " colspan="2" | Choose: | ! style="background-color: #325096; font-size: 12px; text-align: left; padding-left: 10px; " colspan="2" | Choose: | ||
|- | |- | ||
| style="background-color: #5A5959; padding: 15px; width: | | style="background-color: #5A5959; padding: 15px; width: 5%; text-align: right; " colspan="1" | Armour-Piercing Rounds | ||
| | | | ||
<div> | <div> | ||
{| style="background-color: #4E4E4E; width: 100%; font-size: 11px; margin: 5px 5px 0px 0px; " | {| style="background-color: #4E4E4E; width: 100%; font-size: 11px; margin: 5px 5px 0px 0px; " | ||
|- | |- | ||
| style="background-color: #5A5959; padding: 15px; width: | | style="background-color: #5A5959; padding: 15px; width: 5%; text-align: right; " colspan="1" | Armour-Piercing Rounds | ||
|+50% Gatling gun and rifle damage | |+50% Gatling gun and rifle damage | ||
|- | |- | ||
| Line 1,510: | Line 1,510: | ||
|- | |- | ||
| style="background-color: #5A5959; padding: 15px; width: | | style="background-color: #5A5959; padding: 15px; width: 5%; text-align: right; " colspan="1" | Lightweight Rounds | ||
| | | | ||
<div> | <div> | ||
{| style="background-color: #4E4E4E; width: 100%; font-size: 11px; margin: 5px 5px 0px 0px; " | {| style="background-color: #4E4E4E; width: 100%; font-size: 11px; margin: 5px 5px 0px 0px; " | ||
|- | |- | ||
| style="background-color: #5A5959; padding: 15px; width: | | style="background-color: #5A5959; padding: 15px; width: 5%; text-align: right; " colspan="1" | Lightweight Rounds | ||
|+50% Gatling gun and rifle aim and clip | |+50% Gatling gun and rifle aim and clip | ||
|- | |- | ||
| Line 1,531: | Line 1,531: | ||
{| style="background-color: #4E4E4E; border: thin solid black; margin: 0 auto; width: 100%; font-size: 11px; " | {| style="background-color: #4E4E4E; border: thin solid black; margin: 0 auto; width: 100%; font-size: 11px; " | ||
|- | |- | ||
| style="background-color: #5A5959; padding: 15px; width: | | style="background-color: #5A5959; padding: 15px; width: 5%; text-align: right; " colspan="1" | [[File:ANTI_AIR_TACTICS.png|center]] | ||
| style="vertical-align: top; width: 0.1%; " | <div> | | style="vertical-align: top; width: 0.1%; " | <div> | ||
{| style="background-color: #4E4E4E; font-size: 11px; margin: 5px 0px 0px 5px; height: 100%; " | {| style="background-color: #4E4E4E; font-size: 11px; margin: 5px 0px 0px 5px; height: 100%; " | ||
| Line 1,572: | Line 1,572: | ||
{| style="background-color: #4E4E4E; border: thin solid black; margin: 0 auto; width: 100%; font-size: 11px; " | {| style="background-color: #4E4E4E; border: thin solid black; margin: 0 auto; width: 100%; font-size: 11px; " | ||
|- | |- | ||
| style="background-color: #5A5959; padding: 15px; width: | | style="background-color: #5A5959; padding: 15px; width: 5%; text-align: right; " colspan="1" | [[File:ADVANCED_METALLURGY.png|center]] | ||
| style="vertical-align: top; width: 0.1%; " | <div> | | style="vertical-align: top; width: 0.1%; " | <div> | ||
{| style="background-color: #4E4E4E; font-size: 11px; margin: 5px 0px 0px 5px; height: 100%; " | {| style="background-color: #4E4E4E; font-size: 11px; margin: 5px 0px 0px 5px; height: 100%; " | ||
| Line 1,609: | Line 1,609: | ||
| colspan="2" | Lorem ipsum | | colspan="2" | Lorem ipsum | ||
|- | |- | ||
| style="background-color: #5A5959; padding: 15px; width: | | style="background-color: #5A5959; padding: 15px; width: 5%; text-align: right; " colspan="1" | Increased cannon damage | ||
|+20% Cannon damage | |+20% Cannon damage | ||
|- | |- | ||
| colspan="2" | Lorem ipsum | | colspan="2" | Lorem ipsum | ||
|- | |- | ||
| style="background-color: #5A5959; padding: 15px; width: | | style="background-color: #5A5959; padding: 15px; width: 5%; text-align: right; " colspan="1" | Increased saw damage | ||
|+20% Saw damage | |+20% Saw damage | ||
|- | |- | ||
| Line 1,627: | Line 1,627: | ||
{| style="background-color: #4E4E4E; border: thin solid black; margin: 0 auto; width: 100%; font-size: 11px; " | {| style="background-color: #4E4E4E; border: thin solid black; margin: 0 auto; width: 100%; font-size: 11px; " | ||
|- | |- | ||
| style="background-color: #5A5959; padding: 15px; width: | | style="background-color: #5A5959; padding: 15px; width: 5%; text-align: right; " colspan="1" | [[File:BUREAUCRACY.png|center]] | ||
| style="vertical-align: top; width: 0.1%; " | <div> | | style="vertical-align: top; width: 0.1%; " | <div> | ||
{| style="background-color: #4E4E4E; font-size: 11px; margin: 5px 0px 0px 5px; height: 100%; " | {| style="background-color: #4E4E4E; font-size: 11px; margin: 5px 0px 0px 5px; height: 100%; " | ||
| Line 1,664: | Line 1,664: | ||
| colspan="2" | Lorem ipsum | | colspan="2" | Lorem ipsum | ||
|- | |- | ||
| style="background-color: #5A5959; padding: 15px; width: | | style="background-color: #5A5959; padding: 15px; width: 5%; text-align: right; " colspan="1" | Civil Service | ||
|-5 Unrest in towns and cities | |-5 Unrest in towns and cities | ||
|- | |- | ||
| Line 1,677: | Line 1,677: | ||
{| style="background-color: #4E4E4E; border: thin solid black; margin: 0 auto; width: 100%; font-size: 11px; " | {| style="background-color: #4E4E4E; border: thin solid black; margin: 0 auto; width: 100%; font-size: 11px; " | ||
|- | |- | ||
| style="background-color: #5A5959; padding: 15px; width: | | style="background-color: #5A5959; padding: 15px; width: 5%; text-align: right; " colspan="1" | [[File:ADVANCED_FLIGHT.png|center]] | ||
| style="vertical-align: top; width: 0.1%; " | <div> | | style="vertical-align: top; width: 0.1%; " | <div> | ||
{| style="background-color: #4E4E4E; font-size: 11px; margin: 5px 0px 0px 5px; height: 100%; " | {| style="background-color: #4E4E4E; font-size: 11px; margin: 5px 0px 0px 5px; height: 100%; " | ||
| Line 1,726: | Line 1,726: | ||
{| style="background-color: #4E4E4E; border: thin solid black; margin: 0 auto; width: 100%; font-size: 11px; " | {| style="background-color: #4E4E4E; border: thin solid black; margin: 0 auto; width: 100%; font-size: 11px; " | ||
|- | |- | ||
| style="background-color: #5A5959; padding: 15px; width: | | style="background-color: #5A5959; padding: 15px; width: 5%; text-align: right; " colspan="1" | [[File:CYBERNETICS.png|center]] | ||
| style="vertical-align: top; width: 0.1%; " | <div> | | style="vertical-align: top; width: 0.1%; " | <div> | ||
{| style="background-color: #4E4E4E; font-size: 11px; margin: 5px 0px 0px 5px; height: 100%; " | {| style="background-color: #4E4E4E; font-size: 11px; margin: 5px 0px 0px 5px; height: 100%; " | ||
| Line 1,775: | Line 1,775: | ||
{| style="background-color: #4E4E4E; border: thin solid black; margin: 0 auto; width: 100%; font-size: 11px; " | {| style="background-color: #4E4E4E; border: thin solid black; margin: 0 auto; width: 100%; font-size: 11px; " | ||
|- | |- | ||
| style="background-color: #5A5959; padding: 15px; width: | | style="background-color: #5A5959; padding: 15px; width: 5%; text-align: right; " colspan="1" | [[File:AERODYNAMICS.png|center]] | ||
| style="vertical-align: top; width: 0.1%; " | <div> | | style="vertical-align: top; width: 0.1%; " | <div> | ||
{| style="background-color: #4E4E4E; font-size: 11px; margin: 5px 0px 0px 5px; height: 100%; " | {| style="background-color: #4E4E4E; font-size: 11px; margin: 5px 0px 0px 5px; height: 100%; " | ||
| Line 1,804: | Line 1,804: | ||
! style="background-color: #333333; font-size: 12px; text-align: left; padding-left: 10px; " colspan="2" | Unlocks: | ! style="background-color: #333333; font-size: 12px; text-align: left; padding-left: 10px; " colspan="2" | Unlocks: | ||
|- | |- | ||
| style="background-color: #5A5959; padding: 15px; width: | | style="background-color: #5A5959; padding: 15px; width: 5%; text-align: right; " colspan="1" | Aerodynamics | ||
|Double bomb accuracy | |Double bomb accuracy | ||
|- | |- | ||
| Line 1,821: | Line 1,821: | ||
{| style="background-color: #4E4E4E; border: thin solid black; margin: 0 auto; width: 100%; font-size: 11px; " | {| style="background-color: #4E4E4E; border: thin solid black; margin: 0 auto; width: 100%; font-size: 11px; " | ||
|- | |- | ||
| style="background-color: #5A5959; padding: 15px; width: | | style="background-color: #5A5959; padding: 15px; width: 5%; text-align: right; " colspan="1" | [[File:COMPUTERS.png|center]] | ||
| style="vertical-align: top; width: 0.1%; " | <div> | | style="vertical-align: top; width: 0.1%; " | <div> | ||
{| style="background-color: #4E4E4E; font-size: 11px; margin: 5px 0px 0px 5px; height: 100%; " | {| style="background-color: #4E4E4E; font-size: 11px; margin: 5px 0px 0px 5px; height: 100%; " | ||
| Line 1,868: | Line 1,868: | ||
{| style="background-color: #4E4E4E; border: thin solid black; margin: 0 auto; width: 100%; font-size: 11px; " | {| style="background-color: #4E4E4E; border: thin solid black; margin: 0 auto; width: 100%; font-size: 11px; " | ||
|- | |- | ||
| style="background-color: #5A5959; padding: 15px; width: | | style="background-color: #5A5959; padding: 15px; width: 5%; text-align: right; " colspan="1" | [[File:SUSPENDIUM_CANNON.png|center]] | ||
| style="vertical-align: top; width: 0.1%; " | <div> | | style="vertical-align: top; width: 0.1%; " | <div> | ||
{| style="background-color: #4E4E4E; font-size: 11px; margin: 5px 0px 0px 5px; height: 100%; " | {| style="background-color: #4E4E4E; font-size: 11px; margin: 5px 0px 0px 5px; height: 100%; " | ||
| Line 1,911: | Line 1,911: | ||
{| style="background-color: #4E4E4E; border: thin solid black; margin: 0 auto; width: 100%; font-size: 11px; " | {| style="background-color: #4E4E4E; border: thin solid black; margin: 0 auto; width: 100%; font-size: 11px; " | ||
|- | |- | ||
| style="background-color: #5A5959; padding: 15px; width: | | style="background-color: #5A5959; padding: 15px; width: 5%; text-align: right; " colspan="1" | [[File:ADVANCED_FLAMMABLES.png|center]] | ||
| style="vertical-align: top; width: 0.1%; " | <div> | | style="vertical-align: top; width: 0.1%; " | <div> | ||
{| style="background-color: #4E4E4E; font-size: 11px; margin: 5px 0px 0px 5px; height: 100%; " | {| style="background-color: #4E4E4E; font-size: 11px; margin: 5px 0px 0px 5px; height: 100%; " | ||
| Line 1,934: | Line 1,934: | ||
! style="background-color: #325096; font-size: 12px; text-align: left; padding-left: 10px; " colspan="2" | Choose: | ! style="background-color: #325096; font-size: 12px; text-align: left; padding-left: 10px; " colspan="2" | Choose: | ||
|- | |- | ||
| style="background-color: #5A5959; padding: 15px; width: | | style="background-color: #5A5959; padding: 15px; width: 5%; text-align: right; " colspan="1" | High Pressure Jelly | ||
| | | | ||
<div> | <div> | ||
{| style="background-color: #4E4E4E; width: 100%; font-size: 11px; margin: 5px 5px 0px 0px; " | {| style="background-color: #4E4E4E; width: 100%; font-size: 11px; margin: 5px 5px 0px 0px; " | ||
|- | |- | ||
| style="background-color: #5A5959; padding: 15px; width: | | style="background-color: #5A5959; padding: 15px; width: 5%; text-align: right; " colspan="1" | High Pressure Jelly | ||
|+70% Flamethrower range | |+70% Flamethrower range | ||
|- | |- | ||
| Line 1,947: | Line 1,947: | ||
|- | |- | ||
| style="background-color: #5A5959; padding: 15px; width: | | style="background-color: #5A5959; padding: 15px; width: 5%; text-align: right; " colspan="1" | High Temperature Jelly | ||
| | | | ||
<div> | <div> | ||
{| style="background-color: #4E4E4E; width: 100%; font-size: 11px; margin: 5px 5px 0px 0px; " | {| style="background-color: #4E4E4E; width: 100%; font-size: 11px; margin: 5px 5px 0px 0px; " | ||
|- | |- | ||
| style="background-color: #5A5959; padding: 15px; width: | | style="background-color: #5A5959; padding: 15px; width: 5%; text-align: right; " colspan="1" | High Temperature Jelly | ||
|+1 Flamethrowers direct damage | |+1 Flamethrowers direct damage | ||
|- | |- | ||
| Line 1,968: | Line 1,968: | ||
{| style="background-color: #4E4E4E; border: thin solid black; margin: 0 auto; width: 100%; font-size: 11px; " | {| style="background-color: #4E4E4E; border: thin solid black; margin: 0 auto; width: 100%; font-size: 11px; " | ||
|- | |- | ||
| style="background-color: #5A5959; padding: 15px; width: | | style="background-color: #5A5959; padding: 15px; width: 5%; text-align: right; " colspan="1" | [[File:EXPERIMENTAL_RESEARCH.png|center]] | ||
| style="vertical-align: top; width: 0.1%; " | <div> | | style="vertical-align: top; width: 0.1%; " | <div> | ||
{| style="background-color: #4E4E4E; font-size: 11px; margin: 5px 0px 0px 5px; height: 100%; " | {| style="background-color: #4E4E4E; font-size: 11px; margin: 5px 0px 0px 5px; height: 100%; " | ||
| Line 2,009: | Line 2,009: | ||
{| style="background-color: #4E4E4E; border: thin solid black; margin: 0 auto; width: 100%; font-size: 11px; " | {| style="background-color: #4E4E4E; border: thin solid black; margin: 0 auto; width: 100%; font-size: 11px; " | ||
|- | |- | ||
| style="background-color: #5A5959; padding: 15px; width: | | style="background-color: #5A5959; padding: 15px; width: 5%; text-align: right; " colspan="1" | [[File:AUTOMATED_LOADING_SYSTEMS.png|center]] | ||
| style="vertical-align: top; width: 0.1%; " | <div> | | style="vertical-align: top; width: 0.1%; " | <div> | ||
{| style="background-color: #4E4E4E; font-size: 11px; margin: 5px 0px 0px 5px; height: 100%; " | {| style="background-color: #4E4E4E; font-size: 11px; margin: 5px 0px 0px 5px; height: 100%; " | ||
| Line 2,055: | Line 2,055: | ||
{| style="background-color: #4E4E4E; border: thin solid black; margin: 0 auto; width: 100%; font-size: 11px; " | {| style="background-color: #4E4E4E; border: thin solid black; margin: 0 auto; width: 100%; font-size: 11px; " | ||
|- | |- | ||
| style="background-color: #5A5959; padding: 15px; width: | | style="background-color: #5A5959; padding: 15px; width: 5%; text-align: right; " colspan="1" | [[File:GUIDANCE_SYSTEMS.png|center]] | ||
| style="vertical-align: top; width: 0.1%; " | <div> | | style="vertical-align: top; width: 0.1%; " | <div> | ||
{| style="background-color: #4E4E4E; font-size: 11px; margin: 5px 0px 0px 5px; height: 100%; " | {| style="background-color: #4E4E4E; font-size: 11px; margin: 5px 0px 0px 5px; height: 100%; " | ||
| Line 2,092: | Line 2,092: | ||
{| style="background-color: #4E4E4E; border: thin solid black; margin: 0 auto; width: 100%; font-size: 11px; " | {| style="background-color: #4E4E4E; border: thin solid black; margin: 0 auto; width: 100%; font-size: 11px; " | ||
|- | |- | ||
| style="background-color: #5A5959; padding: 15px; width: | | style="background-color: #5A5959; padding: 15px; width: 5%; text-align: right; " colspan="1" | [[File:ADVANCED_ROCKETRY.png|center]] | ||
| style="vertical-align: top; width: 0.1%; " | <div> | | style="vertical-align: top; width: 0.1%; " | <div> | ||
{| style="background-color: #4E4E4E; font-size: 11px; margin: 5px 0px 0px 5px; height: 100%; " | {| style="background-color: #4E4E4E; font-size: 11px; margin: 5px 0px 0px 5px; height: 100%; " | ||
| Line 2,115: | Line 2,115: | ||
! style="background-color: #325096; font-size: 12px; text-align: left; padding-left: 10px; " colspan="2" | Choose: | ! style="background-color: #325096; font-size: 12px; text-align: left; padding-left: 10px; " colspan="2" | Choose: | ||
|- | |- | ||
| style="background-color: #5A5959; padding: 15px; width: | | style="background-color: #5A5959; padding: 15px; width: 5%; text-align: right; " colspan="1" | Active Stabilisation | ||
| | | | ||
<div> | <div> | ||
{| style="background-color: #4E4E4E; width: 100%; font-size: 11px; margin: 5px 5px 0px 0px; " | {| style="background-color: #4E4E4E; width: 100%; font-size: 11px; margin: 5px 5px 0px 0px; " | ||
|- | |- | ||
| style="background-color: #5A5959; padding: 15px; width: | | style="background-color: #5A5959; padding: 15px; width: 5%; text-align: right; " colspan="1" | Active Stabilisation | ||
|Double rocket accuracy | |Double rocket accuracy | ||
|- | |- | ||
| Line 2,128: | Line 2,128: | ||
|- | |- | ||
| style="background-color: #5A5959; padding: 15px; width: | | style="background-color: #5A5959; padding: 15px; width: 5%; text-align: right; " colspan="1" | Rapid Rocket Fire | ||
| | | | ||
<div> | <div> | ||
{| style="background-color: #4E4E4E; width: 100%; font-size: 11px; margin: 5px 5px 0px 0px; " | {| style="background-color: #4E4E4E; width: 100%; font-size: 11px; margin: 5px 5px 0px 0px; " | ||
|- | |- | ||
| style="background-color: #5A5959; padding: 15px; width: | | style="background-color: #5A5959; padding: 15px; width: 5%; text-align: right; " colspan="1" | Rapid Rocket Fire | ||
|Fire 4 small rockets for +100% damage | |Fire 4 small rockets for +100% damage | ||
|- | |- | ||
| Line 2,149: | Line 2,149: | ||
{| style="background-color: #4E4E4E; border: thin solid black; margin: 0 auto; width: 100%; font-size: 11px; " | {| style="background-color: #4E4E4E; border: thin solid black; margin: 0 auto; width: 100%; font-size: 11px; " | ||
|- | |- | ||
| style="background-color: #5A5959; padding: 15px; width: | | style="background-color: #5A5959; padding: 15px; width: 5%; text-align: right; " colspan="1" | [[File:TORPEDO_PLANES.png|center]] | ||
| style="vertical-align: top; width: 0.1%; " | <div> | | style="vertical-align: top; width: 0.1%; " | <div> | ||
{| style="background-color: #4E4E4E; font-size: 11px; margin: 5px 0px 0px 5px; height: 100%; " | {| style="background-color: #4E4E4E; font-size: 11px; margin: 5px 0px 0px 5px; height: 100%; " | ||
| Line 2,174: | Line 2,174: | ||
! style="background-color: #333333; font-size: 12px; text-align: left; padding-left: 10px; " colspan="2" | Unlocks: | ! style="background-color: #333333; font-size: 12px; text-align: left; padding-left: 10px; " colspan="2" | Unlocks: | ||
|- | |- | ||
| style="background-color: #5A5959; padding: 15px; width: | | style="background-color: #5A5959; padding: 15px; width: 5%; text-align: right; " colspan="1" | Torpedo Planes | ||
|Torpedo Bombers | |Torpedo Bombers | ||
|- | |- | ||
| Line 2,187: | Line 2,187: | ||
{| style="background-color: #4E4E4E; border: thin solid black; margin: 0 auto; width: 100%; font-size: 11px; " | {| style="background-color: #4E4E4E; border: thin solid black; margin: 0 auto; width: 100%; font-size: 11px; " | ||
|- | |- | ||
| style="background-color: #5A5959; padding: 15px; width: | | style="background-color: #5A5959; padding: 15px; width: 5%; text-align: right; " colspan="1" | [[File:STATISTICAL_ANALYSIS.png|center]] | ||
| style="vertical-align: top; width: 0.1%; " | <div> | | style="vertical-align: top; width: 0.1%; " | <div> | ||
{| style="background-color: #4E4E4E; font-size: 11px; margin: 5px 0px 0px 5px; height: 100%; " | {| style="background-color: #4E4E4E; font-size: 11px; margin: 5px 0px 0px 5px; height: 100%; " | ||
| Line 2,210: | Line 2,210: | ||
! style="background-color: #325096; font-size: 12px; text-align: left; padding-left: 10px; " colspan="2" | Choose: | ! style="background-color: #325096; font-size: 12px; text-align: left; padding-left: 10px; " colspan="2" | Choose: | ||
|- | |- | ||
| style="background-color: #5A5959; padding: 15px; width: | | style="background-color: #5A5959; padding: 15px; width: 5%; text-align: right; " colspan="1" | Monocoque Construction | ||
| | | | ||
<div> | <div> | ||
{| style="background-color: #4E4E4E; width: 100%; font-size: 11px; margin: 5px 5px 0px 0px; " | {| style="background-color: #4E4E4E; width: 100%; font-size: 11px; margin: 5px 5px 0px 0px; " | ||
|- | |- | ||
| style="background-color: #5A5959; padding: 15px; width: | | style="background-color: #5A5959; padding: 15px; width: 5%; text-align: right; " colspan="1" | Monocoque Construction | ||
|+30% Airplane speed and dodge, -50% maintenance cost | |+30% Airplane speed and dodge, -50% maintenance cost | ||
|- | |- | ||
| Line 2,223: | Line 2,223: | ||
|- | |- | ||
| style="background-color: #5A5959; padding: 15px; width: | | style="background-color: #5A5959; padding: 15px; width: 5%; text-align: right; " colspan="1" | Selective Uparmouring | ||
| | | | ||
<div> | <div> | ||
{| style="background-color: #4E4E4E; width: 100%; font-size: 11px; margin: 5px 5px 0px 0px; " | {| style="background-color: #4E4E4E; width: 100%; font-size: 11px; margin: 5px 5px 0px 0px; " | ||
|- | |- | ||
| style="background-color: #5A5959; padding: 15px; width: | | style="background-color: #5A5959; padding: 15px; width: 5%; text-align: right; " colspan="1" | Selective Uparmouring | ||
|+40% Airplane HP | |+40% Airplane HP | ||
|- | |- | ||
| Line 2,244: | Line 2,244: | ||
{| style="background-color: #4E4E4E; border: thin solid black; margin: 0 auto; width: 100%; font-size: 11px; " | {| style="background-color: #4E4E4E; border: thin solid black; margin: 0 auto; width: 100%; font-size: 11px; " | ||
|- | |- | ||
| style="background-color: #5A5959; padding: 15px; width: | | style="background-color: #5A5959; padding: 15px; width: 5%; text-align: right; " colspan="1" | [[File:ROBOTICS.png|center]] | ||
| style="vertical-align: top; width: 0.1%; " | <div> | | style="vertical-align: top; width: 0.1%; " | <div> | ||
{| style="background-color: #4E4E4E; font-size: 11px; margin: 5px 0px 0px 5px; height: 100%; " | {| style="background-color: #4E4E4E; font-size: 11px; margin: 5px 0px 0px 5px; height: 100%; " | ||
| Line 2,279: | Line 2,279: | ||
{| style="background-color: #4E4E4E; border: thin solid black; margin: 0 auto; width: 100%; font-size: 11px; " | {| style="background-color: #4E4E4E; border: thin solid black; margin: 0 auto; width: 100%; font-size: 11px; " | ||
|- | |- | ||
| style="background-color: #5A5959; padding: 15px; width: | | style="background-color: #5A5959; padding: 15px; width: 5%; text-align: right; " colspan="1" | [[File:EXOSKELETONS.png|center]] | ||
| style="vertical-align: top; width: 0.1%; " | <div> | | style="vertical-align: top; width: 0.1%; " | <div> | ||
{| style="background-color: #4E4E4E; font-size: 11px; margin: 5px 0px 0px 5px; height: 100%; " | {| style="background-color: #4E4E4E; font-size: 11px; margin: 5px 0px 0px 5px; height: 100%; " | ||
| Line 2,316: | Line 2,316: | ||
{| style="background-color: #4E4E4E; border: thin solid black; margin: 0 auto; width: 100%; font-size: 11px; " | {| style="background-color: #4E4E4E; border: thin solid black; margin: 0 auto; width: 100%; font-size: 11px; " | ||
|- | |- | ||
| style="background-color: #5A5959; padding: 15px; width: | | style="background-color: #5A5959; padding: 15px; width: 5%; text-align: right; " colspan="1" | [[File:STATE_SECURITY.png|center]] | ||
| style="vertical-align: top; width: 0.1%; " | <div> | | style="vertical-align: top; width: 0.1%; " | <div> | ||
{| style="background-color: #4E4E4E; font-size: 11px; margin: 5px 0px 0px 5px; height: 100%; " | {| style="background-color: #4E4E4E; font-size: 11px; margin: 5px 0px 0px 5px; height: 100%; " | ||
| Line 2,343: | Line 2,343: | ||
| colspan="2" | Lorem ipsum | | colspan="2" | Lorem ipsum | ||
|- | |- | ||
| style="background-color: #5A5959; padding: 15px; width: | | style="background-color: #5A5959; padding: 15px; width: 5%; text-align: right; " colspan="1" | Military Bureaucracy | ||
|Double fleet supply limit | |Double fleet supply limit | ||
|- | |- | ||
| Line 2,356: | Line 2,356: | ||
{| style="background-color: #4E4E4E; border: thin solid black; margin: 0 auto; width: 100%; font-size: 11px; " | {| style="background-color: #4E4E4E; border: thin solid black; margin: 0 auto; width: 100%; font-size: 11px; " | ||
|- | |- | ||
| style="background-color: #5A5959; padding: 15px; width: | | style="background-color: #5A5959; padding: 15px; width: 5%; text-align: right; " colspan="1" | [[File:AUTOMATED_SUPPLY_SYSTEMS.png|center]] | ||
| style="vertical-align: top; width: 0.1%; " | <div> | | style="vertical-align: top; width: 0.1%; " | <div> | ||
{| style="background-color: #4E4E4E; font-size: 11px; margin: 5px 0px 0px 5px; height: 100%; " | {| style="background-color: #4E4E4E; font-size: 11px; margin: 5px 0px 0px 5px; height: 100%; " | ||
| Line 2,379: | Line 2,379: | ||
! style="background-color: #333333; font-size: 12px; text-align: left; padding-left: 10px; " colspan="2" | Unlocks: | ! style="background-color: #333333; font-size: 12px; text-align: left; padding-left: 10px; " colspan="2" | Unlocks: | ||
|- | |- | ||
| style="background-color: #5A5959; padding: 15px; width: | | style="background-color: #5A5959; padding: 15px; width: 5%; text-align: right; " colspan="1" | Automated Supply Systems | ||
|+50% fleet resupply speed | |+50% fleet resupply speed | ||
|- | |- | ||
| Line 2,392: | Line 2,392: | ||
{| style="background-color: #4E4E4E; border: thin solid black; margin: 0 auto; width: 100%; font-size: 11px; " | {| style="background-color: #4E4E4E; border: thin solid black; margin: 0 auto; width: 100%; font-size: 11px; " | ||
|- | |- | ||
| style="background-color: #5A5959; padding: 15px; width: | | style="background-color: #5A5959; padding: 15px; width: 5%; text-align: right; " colspan="1" | [[File:BIOSTRUCTURES.png|center]] | ||
| style="vertical-align: top; width: 0.1%; " | <div> | | style="vertical-align: top; width: 0.1%; " | <div> | ||
{| style="background-color: #4E4E4E; font-size: 11px; margin: 5px 0px 0px 5px; height: 100%; " | {| style="background-color: #4E4E4E; font-size: 11px; margin: 5px 0px 0px 5px; height: 100%; " | ||
| Line 2,415: | Line 2,415: | ||
! style="background-color: #325096; font-size: 12px; text-align: left; padding-left: 10px; " colspan="2" | Choose: | ! style="background-color: #325096; font-size: 12px; text-align: left; padding-left: 10px; " colspan="2" | Choose: | ||
|- | |- | ||
| style="background-color: #5A5959; padding: 15px; width: | | style="background-color: #5A5959; padding: 15px; width: 5%; text-align: right; " colspan="1" | Reticulated Plating | ||
| | | | ||
<div> | <div> | ||
{| style="background-color: #4E4E4E; width: 100%; font-size: 11px; margin: 5px 5px 0px 0px; " | {| style="background-color: #4E4E4E; width: 100%; font-size: 11px; margin: 5px 5px 0px 0px; " | ||
|- | |- | ||
| style="background-color: #5A5959; padding: 15px; width: | | style="background-color: #5A5959; padding: 15px; width: 5%; text-align: right; " colspan="1" | Reticulated Plating | ||
|-30% Steel armour weight | |-30% Steel armour weight | ||
|- | |- | ||
| Line 2,428: | Line 2,428: | ||
|- | |- | ||
| style="background-color: #5A5959; padding: 15px; width: | | style="background-color: #5A5959; padding: 15px; width: 5%; text-align: right; " colspan="1" | Shaped Hulls | ||
| | | | ||
<div> | <div> | ||
{| style="background-color: #4E4E4E; width: 100%; font-size: 11px; margin: 5px 5px 0px 0px; " | {| style="background-color: #4E4E4E; width: 100%; font-size: 11px; margin: 5px 5px 0px 0px; " | ||
|- | |- | ||
| style="background-color: #5A5959; padding: 15px; width: | | style="background-color: #5A5959; padding: 15px; width: 5%; text-align: right; " colspan="1" | Shaped Hulls | ||
|+50% Steel armour blast absorb | |+50% Steel armour blast absorb | ||
|- | |- | ||
| Line 2,449: | Line 2,449: | ||
{| style="background-color: #4E4E4E; border: thin solid black; margin: 0 auto; width: 100%; font-size: 11px; " | {| style="background-color: #4E4E4E; border: thin solid black; margin: 0 auto; width: 100%; font-size: 11px; " | ||
|- | |- | ||
| style="background-color: #5A5959; padding: 15px; width: | | style="background-color: #5A5959; padding: 15px; width: 5%; text-align: right; " colspan="1" | [[File:ADVANCED_SUSPENDIUM_WEAPONS.png|center]] | ||
| style="vertical-align: top; width: 0.1%; " | <div> | | style="vertical-align: top; width: 0.1%; " | <div> | ||
{| style="background-color: #4E4E4E; font-size: 11px; margin: 5px 0px 0px 5px; height: 100%; " | {| style="background-color: #4E4E4E; font-size: 11px; margin: 5px 0px 0px 5px; height: 100%; " | ||
| Line 2,486: | Line 2,486: | ||
{| style="background-color: #4E4E4E; border: thin solid black; margin: 0 auto; width: 100%; font-size: 11px; " | {| style="background-color: #4E4E4E; border: thin solid black; margin: 0 auto; width: 100%; font-size: 11px; " | ||
|- | |- | ||
| style="background-color: #5A5959; padding: 15px; width: | | style="background-color: #5A5959; padding: 15px; width: 5%; text-align: right; " colspan="1" | [[File:MILITARY_ORGANISATION.png|center]] | ||
| style="vertical-align: top; width: 0.1%; " | <div> | | style="vertical-align: top; width: 0.1%; " | <div> | ||
{| style="background-color: #4E4E4E; font-size: 11px; margin: 5px 0px 0px 5px; height: 100%; " | {| style="background-color: #4E4E4E; font-size: 11px; margin: 5px 0px 0px 5px; height: 100%; " | ||
| Line 2,509: | Line 2,509: | ||
! style="background-color: #325096; font-size: 12px; text-align: left; padding-left: 10px; " colspan="2" | Choose: | ! style="background-color: #325096; font-size: 12px; text-align: left; padding-left: 10px; " colspan="2" | Choose: | ||
|- | |- | ||
| style="background-color: #5A5959; padding: 15px; width: | | style="background-color: #5A5959; padding: 15px; width: 5%; text-align: right; " colspan="1" | Universal Conscription | ||
| | | | ||
<div> | <div> | ||
{| style="background-color: #4E4E4E; width: 100%; font-size: 11px; margin: 5px 5px 0px 0px; " | {| style="background-color: #4E4E4E; width: 100%; font-size: 11px; margin: 5px 5px 0px 0px; " | ||
|- | |- | ||
| style="background-color: #5A5959; padding: 15px; width: | | style="background-color: #5A5959; padding: 15px; width: 5%; text-align: right; " colspan="1" | Universal Conscription | ||
|-25% Sailor maintenance cost | |-25% Sailor maintenance cost | ||
|- | |- | ||
| Line 2,522: | Line 2,522: | ||
|- | |- | ||
| style="background-color: #5A5959; padding: 15px; width: | | style="background-color: #5A5959; padding: 15px; width: 5%; text-align: right; " colspan="1" | Martial Caste | ||
| | | | ||
<div> | <div> | ||
{| style="background-color: #4E4E4E; width: 100%; font-size: 11px; margin: 5px 5px 0px 0px; " | {| style="background-color: #4E4E4E; width: 100%; font-size: 11px; margin: 5px 5px 0px 0px; " | ||
|- | |- | ||
| style="background-color: #5A5959; padding: 15px; width: | | style="background-color: #5A5959; padding: 15px; width: 5%; text-align: right; " colspan="1" | Martial Caste | ||
|-50% Troops maintenance cost | |-50% Troops maintenance cost | ||
|- | |- | ||
| Line 2,543: | Line 2,543: | ||
{| style="background-color: #4E4E4E; border: thin solid black; margin: 0 auto; width: 100%; font-size: 11px; " | {| style="background-color: #4E4E4E; border: thin solid black; margin: 0 auto; width: 100%; font-size: 11px; " | ||
|- | |- | ||
| style="background-color: #5A5959; padding: 15px; width: | | style="background-color: #5A5959; padding: 15px; width: 5%; text-align: right; " colspan="1" | [[File:ADVANCED_FUZES.png|center]] | ||
| style="vertical-align: top; width: 0.1%; " | <div> | | style="vertical-align: top; width: 0.1%; " | <div> | ||
{| style="background-color: #4E4E4E; font-size: 11px; margin: 5px 0px 0px 5px; height: 100%; " | {| style="background-color: #4E4E4E; font-size: 11px; margin: 5px 0px 0px 5px; height: 100%; " | ||
| Line 2,566: | Line 2,566: | ||
! style="background-color: #325096; font-size: 12px; text-align: left; padding-left: 10px; " colspan="2" | Choose: | ! style="background-color: #325096; font-size: 12px; text-align: left; padding-left: 10px; " colspan="2" | Choose: | ||
|- | |- | ||
| style="background-color: #5A5959; padding: 15px; width: | | style="background-color: #5A5959; padding: 15px; width: 5%; text-align: right; " colspan="1" | Safety Fuzes | ||
| | | | ||
<div> | <div> | ||
{| style="background-color: #4E4E4E; width: 100%; font-size: 11px; margin: 5px 5px 0px 0px; " | {| style="background-color: #4E4E4E; width: 100%; font-size: 11px; margin: 5px 5px 0px 0px; " | ||
|- | |- | ||
| style="background-color: #5A5959; padding: 15px; width: | | style="background-color: #5A5959; padding: 15px; width: 5%; text-align: right; " colspan="1" | Safety Fuzes | ||
|Reduced torpedo minimum range | |Reduced torpedo minimum range | ||
|- | |- | ||
| Line 2,579: | Line 2,579: | ||
|- | |- | ||
| style="background-color: #5A5959; padding: 15px; width: | | style="background-color: #5A5959; padding: 15px; width: 5%; text-align: right; " colspan="1" | Optimal Distance Fuze | ||
| | | | ||
<div> | <div> | ||
{| style="background-color: #4E4E4E; width: 100%; font-size: 11px; margin: 5px 5px 0px 0px; " | {| style="background-color: #4E4E4E; width: 100%; font-size: 11px; margin: 5px 5px 0px 0px; " | ||
|- | |- | ||
| style="background-color: #5A5959; padding: 15px; width: | | style="background-color: #5A5959; padding: 15px; width: 5%; text-align: right; " colspan="1" | Optimal Distance Fuze | ||
|+20% Torpedo damage | |+20% Torpedo damage | ||
|- | |- | ||
| Line 2,600: | Line 2,600: | ||
{| style="background-color: #4E4E4E; border: thin solid black; margin: 0 auto; width: 100%; font-size: 11px; " | {| style="background-color: #4E4E4E; border: thin solid black; margin: 0 auto; width: 100%; font-size: 11px; " | ||
|- | |- | ||
| style="background-color: #5A5959; padding: 15px; width: | | style="background-color: #5A5959; padding: 15px; width: 5%; text-align: right; " colspan="1" | [[File:INDUSTRIAL_AUTOMATION.png|center]] | ||
| style="vertical-align: top; width: 0.1%; " | <div> | | style="vertical-align: top; width: 0.1%; " | <div> | ||
{| style="background-color: #4E4E4E; font-size: 11px; margin: 5px 0px 0px 5px; height: 100%; " | {| style="background-color: #4E4E4E; font-size: 11px; margin: 5px 0px 0px 5px; height: 100%; " | ||
| Line 2,625: | Line 2,625: | ||
! style="background-color: #333333; font-size: 12px; text-align: left; padding-left: 10px; " colspan="2" | Unlocks: | ! style="background-color: #333333; font-size: 12px; text-align: left; padding-left: 10px; " colspan="2" | Unlocks: | ||
|- | |- | ||
| style="background-color: #5A5959; padding: 15px; width: | | style="background-color: #5A5959; padding: 15px; width: 5%; text-align: right; " colspan="1" | Industrial Automation | ||
|+50% ship construction speed | |+50% ship construction speed | ||
|- | |- | ||
Latest revision as of 21:06, 11 October 2022
Technologies exist within the research tree in the campaign. Not all technologies can be researched at the same time.
Tier 0 technologies
Gunnery
 |
|
| ||||||||||||||

Mercantilism
 |
|
| |||||||||||

Energised Suspendium
 |
|
| |||||||||||
Explosives
 |
|
| |||||||||||
Machinery
 |
|
| |||||||||||||||
Officer Training
 |
|
| |||||||||||||||

Rifling
 |
|
| |||||||||||
Empiricism
 |
|
| |||||||||||
Military Training
 |
|
| ||||||||||||||||||

Tier 1 technologies
Advanced Explosives
 |
|
|
| ||||||||||||

Ammo Storage
 |
|
| |||||||||||||||||
Reinforced Hulls
 |
|
|
| ||||||||||||||||||||
Scientific Method
 |
|
|
| ||||||||||||||||||||||

Articulated Machinery
 |
|
|
| |||||||||||||||||||

Optics
 |
|
|
| ||||||||||||||||
Aerial Corps
 |
|
|
| ||||||||||||||||||||||

Metallurgy
 |
|
|
| |||||||||||||||||||
Security Services
 |
|
|
| |||||||||||||||||||

Economics
 |
|
|
| |||||||||||||||||||||


Tier 2 technologies
Heavier than Air Flight
 |
|
|
| |||||||||||||||


Heavy Cannon
 |
|
|
| ||||||||||||||||||

Scientific Suspendium Mining
 |
|
|
| |||||||||||||||||||

Machining
 |
|
| |||||||||||||||||||||

City Planning
 |
|
| |||||||||||||||||
Combustibles
 |
|
|
| |||||||||||||||

Civil Society
 |
|
|
| ||||||||||||||||||

Gyroscopes
 |
|
|
| ||||||||||||||||||

Aerial Strategy
 |
|
|
| |||||||||||||||||||||||
Elite Infantry
 |
|
|
| ||||||||||||||||||
Biomimetics
 |
|
|
| ||||||||||||||||
Cartography
 |
|
| ||||||||||
Tier 3 technologies
Loading Drills
 |
|
|
| |||||||||||||||||||

Small Arms Ballistics
 |
|
| |||||||||||||||||
Anti-Air Tactics
 |
|
|
| ||||||||||||

Advanced Metallurgy
 |
|
|
| ||||||||||||||||||||||||


Bureaucracy
 |
|
|
| |||||||||||||||||||||

Advanced Flight
 |
|
|
| ||||||||||||||||||||
Cybernetics
 |
|
|
| ||||||||||||||||||||||||
Aerodynamics
 |
|
|
| ||||||||||||||||
Computers
 |
|
|
| |||||||||||||||||||

Suspendium Projection
 |
|
|
| |||||||||||||||
Advanced Flammables
 |
|
| |||||||||||||||||
Experimental Research
 |
|
|
| ||||||||||||
Automated Loading Systems
 |
|
|
| ||||||||||||||||||
Tier 4 technologies
Guidance Systems
 |
|
| ||||||||||||||
Advanced Rocketry
 |
|
| |||||||||||||||||||
Torpedo Planes
 |
|
| ||||||||||||||
Statistical Analysis
 |
|
| |||||||||||||||||
Robotics
 |
|
| |||||||||||
Exoskeletons
 |
|
| ||||||||||||||
Deep State
 |
|
| |||||||||||||||
Automated Supply Systems
 |
|
| ||||||||||
Biostructures
 |
|
| |||||||||||||||||
Advanced Suspendium Weapons
 |
|
| ||||||||||||||
Military Organisation
 |
|
| |||||||||||||||||
Advanced Fuzes
 |
|
| ||||||||||||||||||
Industrial Automation
 |
|
| |||||||||||||